Vision Engraver
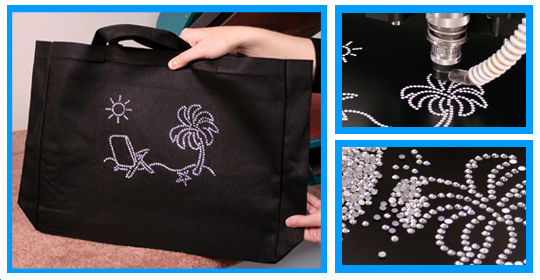
Did you know that you can create rhinestone designs for fabric using your rotary Vision engraver? By creating a simple engraved template, you can add hot-fix rhinestones to t-shirts, jeans, bags, hats, and much more. Using Vision Pro software, a Vision VE810 (or larger) engraver, and a heat press, you can get in on this popular and profitable fashion trend
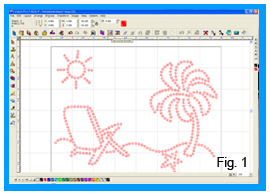 directly in Vision Pro software or import graphics from many other programs, such as CorelDraw. Once the job is set up, select the design’s outlines and create a tool path using the Drill Contour option. This tool allows you to place engraving points directly along the lines of your vector-based graphic. You can choose from three options for your drill points – you can specify the number of points, the distance between points, or choose to place a point on each node of the graphic. You can also combine options, such as specifying both distance and node points.
Place your plastic template material onto the t-slot table of the Vision engraver, and choose
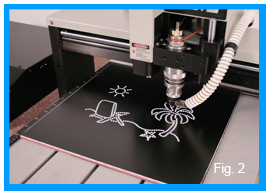 a cutter that is the right size for your stones. For this example, we used a .110” parallel cutter to drill the holes, which matched the size of our rhinestones most closely. We used the proximity sensor on the Vision engraver machine to guarantee a consistent depth when engraving, and set the micrometer on the spindle to .020”. When you send the job to engrave, the engraving tool cuts the holes into the plastic material, creating the holes for the rhinestones (Fig. 2).
![]()
When the template is completed, pour your rhinestones onto the design (Fig. 3). Using 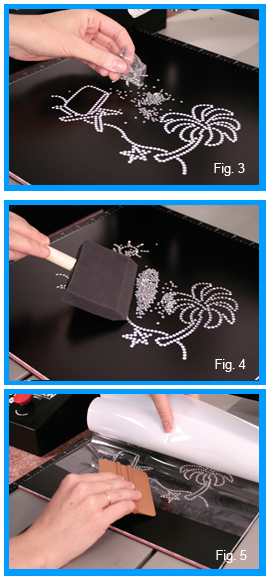 a flat pad-style brush, gently brush the stones over the engraved holes in the plastic (Fig. 4). The brush helps the stones go directly into place; any stones that are upside down will not stay in the holes. When all of the holes are filled, brush off any excess stones.
![]()
Next, apply a piece of transfer tape over the template, pressing carefully to make sure that all stones are touching the tape (Fig. 5). Pull away gently; all the stones in the design will adhere to the tape, and the design will be ready to add to your item.
![]()
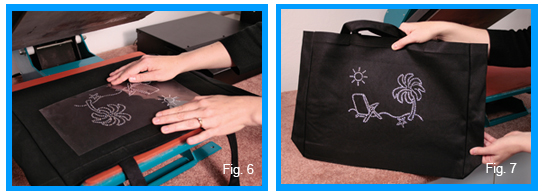
The next step is to transfer the stones to your fabric. First, make sure that your item is flat to get a smooth surface (we used the heat press to “iron” the bag before putting down our design). Place your template design onto your item (rhinestones facing down onto the fabric), leaving the tape attached to the stones (Fig. 6), and press your design onto the fabric. (We set a time of 15 seconds and a temperature of 350 degrees.) When you lift the press up, carefully remove your project from the press (Fig. 7). Wait for a few seconds and then remove your tape from the design. Your rhinestones will be attached to your fabric and should withstand wear and washing.
![]()
Once created, you can use your template again and again with your Vision engraver to create additional items with the same design. By following these basic steps for other projects, you will be able to create countless designs for apparel and accessories.
Contact Vision Engravers today to learn more about Vision engraver machines, get a price quote, request a free sample or call 1-888-637-1737.